How to Build a Custom Headless Shopify Experience in 2026 Using Storefront Web Components
Learn how to build custom Shopify landing pages in 2026 using Storefront Web Components and the Shopify Headless app to boost conversions while keeping checkout simple.
In 2026, the standard Shopify theme is no longer the ceiling for ambitious DTC brands—it is the floor. As customer acquisition costs on platforms like Meta Ads and TikTok Ads continue to rise, the ability to deploy ultra-fast, highly specific landing pages on platforms like Webflow, Framer, or custom-built stacks has become a competitive necessity. This is the era of headless commerce for everyone, where you keep the world-class checkout of Shopify but gain total control over the frontend experience.
Historically, going headless required a team of senior engineers and complex GraphQL queries. However, in 2026, Shopify has bridged the gap with Storefront Web Components. These are modular, pre-built HTML tags that allow marketers and designers to pull live product data—titles, prices, inventory, and variants—into any website with just a few lines of code. This guide will walk you through building a custom headless experience that converts, while an AI ecommerce employee like Stormy AI handles the operational mess in the background.
The Two Paths to Headless: Buy Buttons vs. Web Components
Discover the two main strategies for implementing a headless Shopify store architecture today.

When you want to sell Shopify products on a different platform, you have two primary options. The first is the classic Shopify Buy Button. It is a quick win that takes about three minutes to set up. You simply install the app, select a product, and Shopify generates a code snippet you can embed on your site. While convenient, it is notoriously difficult to customize. You are often stuck with Shopify's default layout and styling constraints.
| Feature | Shopify Buy Button | Storefront Web Components |
|---|---|---|
| Setup Time | 2-5 Minutes | 15-30 Minutes |
| Customization | Limited CSS/Layout | Full HTML/CSS Control |
| Technical Barrier | None (Copy/Paste) | Low (Basic HTML) |
| Best For | Simple Blog Posts | High-Converting Landing Pages |
The second path, and the focus of this tutorial, is using Shopify Storefront Web Components. This approach uses the Shopify Storefront API but abstracts away the technical complexity. Instead of writing GraphQL queries, you use simple tags like <shopify-store> and <shopify-data>. This gives you the flexibility of a fully custom site without the engineering overhead.
"The brand that can build a custom landing page in hours instead of weeks is the one that wins the ROAS war in 2026."
Step 1: Installing the Shopify Headless App
To use Web Components for more than just basic public data (like fetching live inventory levels), you need an access token. In 2026, Shopify manages this through the Headless App, which is available for free on the Shopify App Store. This app acts as your command center for managing API permissions.
- Install the App: Search for "Headless" in your Shopify admin and install the app maintained by Shopify.
- Create a Storefront: Once inside the app, click "Create Storefront." This will generate your public access token.
- Manage Permissions: Click on "Manage API access." Under the Storefront API section, you can toggle specific permissions. For most landing pages, you will want to enable unauthenticated read for product inventory to show "Low Stock" warnings that drive urgency.
- Copy Your Token: Save the public access token; you will need to paste this into your HTML wrapper later.
Step 2: Understanding the Component Structure
See how to organize product data into a custom templating structure using web components.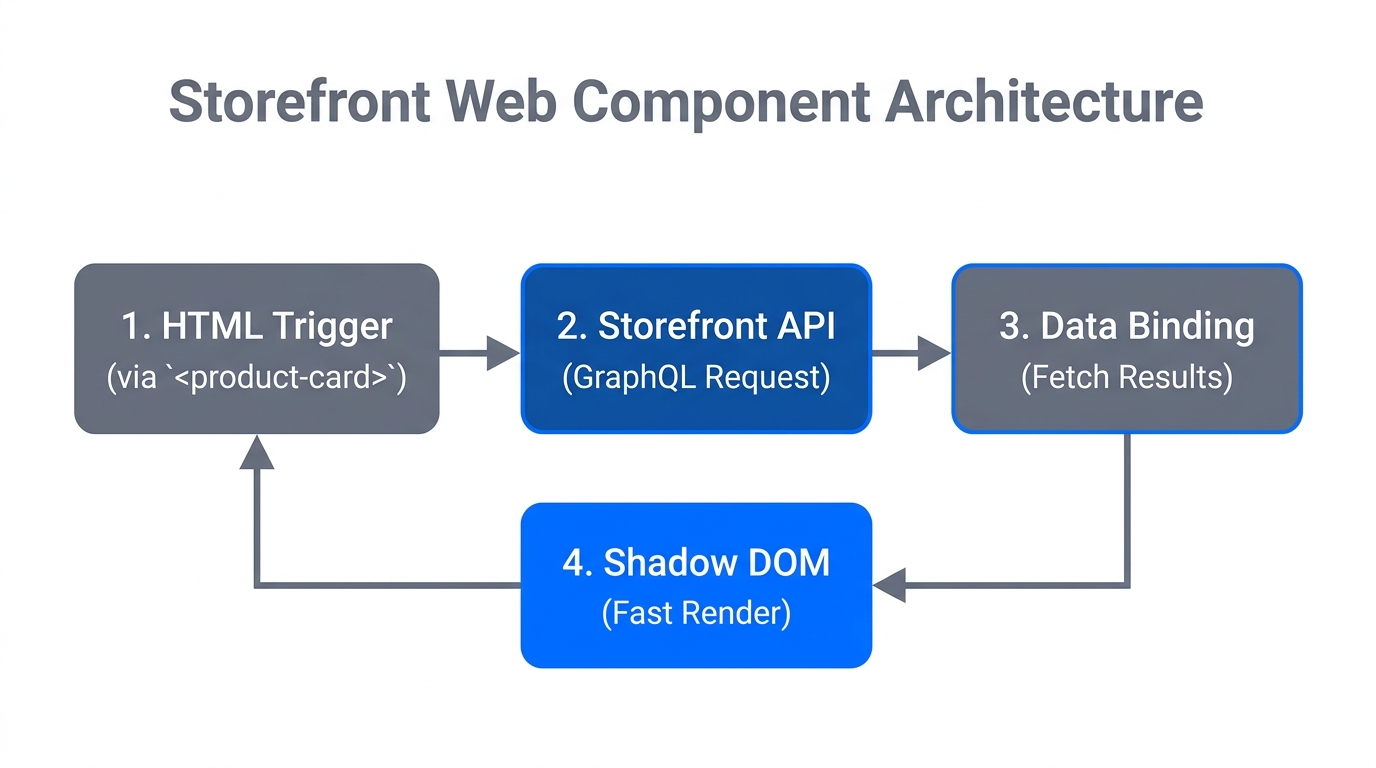
The beauty of Web Components is that they function like a templating language. Everything starts with the <shopify-store> tag, which wraps your entire product section. Inside this, you provide the context of which product you are displaying using the <shopify-context> tag.
Here is the basic hierarchy you will use:
<shopify-store>: Defines your store domain and public access token.<shopify-context>: Defines the product handle (e.g., "premium-blend-coffee").<shopify-data>: Fetches specific fields likeproduct.titleorproduct.description.<shopify-money>: Formats price data automatically based on your store's currency settings.
While you are setting up these frontend layouts, Stormy AI can be working in the back office. As soon as a customer hits "Checkout" on your custom page, Stormy can monitor the order, flag if it requires special packaging, and even follow up with your supplier if the inventory levels you're displaying start to run thin. Stormy acts as the bridge between your custom frontend and your messy physical operations.
Step 3: Flipping Layouts and Moving Data Fields
Learn how to use CSS and HTML to completely customize your headless product layouts.The primary reason marketers choose headless is to break the grid. In a standard Shopify theme, your product title is almost always above the price. With Web Components, you have absolute freedom to reorder elements for better visual hierarchy.
Example: Moving Price Above the Title
To optimize for a high-end luxury feel, you might want the price to be small and situated above a large, bold product title. In your code, you simply cut the <shopify-money> component and paste it above the <shopify-data> tag for the title. Because these are standard HTML elements, you can wrap them in <div> tags and use CSS Flexbox or Grid to style them exactly as you wish.
"Design is not just how it looks, but how it converts. Web Components allow you to test radical layout shifts without touching a liquid file."
Step 4: Displaying Live Inventory and Protected Data
Master the process of requesting and showing live product inventory counts via the API.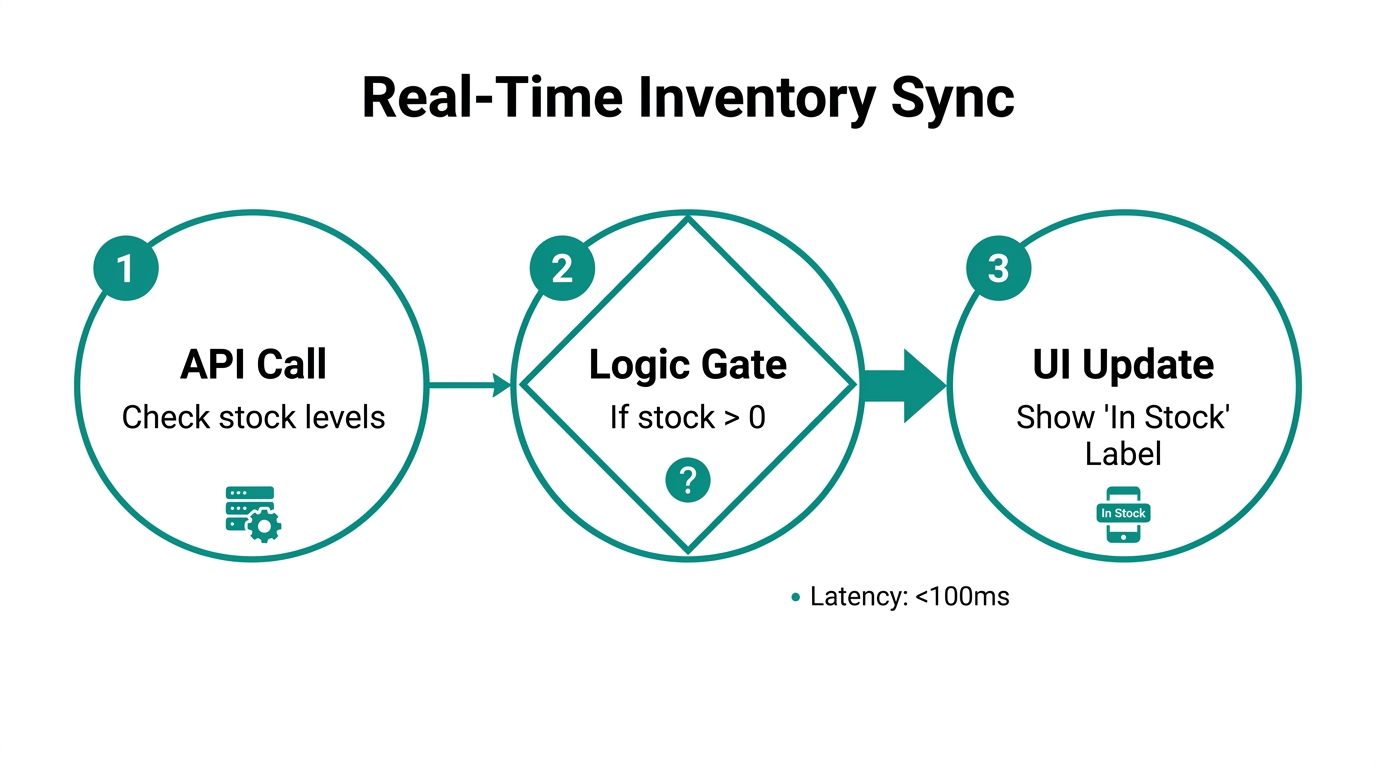
Urgency is a massive conversion lever. Showing "Only 12 items left" is significantly more effective than a generic "In Stock" badge. However, inventory data is often protected. This is where the public access token you generated in Step 1 comes into play.
On your <shopify-store> tag, you will add an attribute called public-access-token. Once this is present, you can use the following data query:
<shopify-data query="product.totalInventory"></shopify-data>
If you see an "Access Denied" error, it means your token is missing or the permissions in the Headless app aren't set to allow unauthenticated inventory reads. Once fixed, this number will update in real-time as orders roll in across all your sales channels, from Amazon to TikTok Shop.
Optimizing for Mobile Conversion in 2026

Over 80% of DTC traffic in 2026 comes from mobile devices, specifically through TikTok and Instagram. A custom headless page allows you to create a "mobile-first" experience that feels more like an app than a website. Here is how to reorder elements for mobile success:
- Sticky Add-to-Cart: Use a separate Web Component for the "Add to Cart" button and pin it to the bottom of the viewport.
- Variant Selection Above the Fold: Don't make users scroll to find the color or size they want. Move the
<shopify-variant-select>component immediately under the product image. - Social Proof Integration: Use a custom
<div>to pull in UGC (User Generated Content) from your Stormy AI-managed creator campaigns directly next to the purchase button.
When these orders start hitting your Shopify backend, the logistics can get overwhelming. Stormy AI acts as your automated ops manager. It can pull campaign performance from Google Ads and Meta, compare it to the revenue generated on your custom headless page, and drop a daily ROAS report into your Slack so you know exactly which landing page is winning.
The Future of Headless is Component-Based
Building a headless Shopify store in 2026 no longer requires a $50,000 developer budget. By leveraging Storefront Web Components and the Shopify Headless app, DTC operators can launch high-converting, custom-tailored experiences in a single afternoon. You get the speed of a landing page builder with the enterprise power of the Shopify ecosystem.
As you scale these custom pages, don't let the back office become the bottleneck. Use Stormy AI to automate the tedious parts of ecommerce—monitoring inventory, following up with suppliers, and tracking performance—so you can stay focused on building the next great brand experience. Whether you are using Webflow, Framer, or a custom stack, the tools to dominate 2026 are already at your fingertips.